


design
“'The Spaces in Between' shawl by Melinda Abodeely”
Description
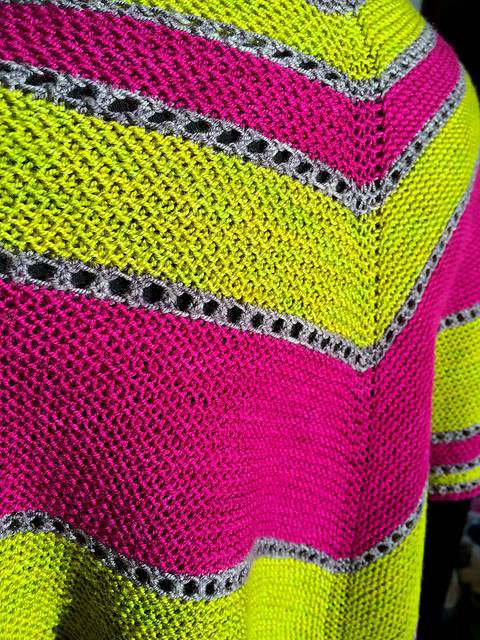
One of my favorite things to do while working at my LYS is to unpack and shelve the new yarns. When we got in our last shipment of Ella Rae yarns, I instantly fell in love! The vibrant magenta kettle dyed, the lime green with a hint of yellow, & purplish grey Lace Merino were calling my name.
I knew I had to make something using those three yarns together, but I simply didn’t know what. After hours of pattern browsing, I still hadn’t found the perfect project. Rather than continuing to dig, I grabbed my sketchpad and started drawing something up. While I had knit 2 shawls before, I had never designed my own. I picked a shape I liked and played with the color distribution by filling it in with colored pencils. After about 30 minutes of sketching I knew, this was it! I picked up my needles and cast on, typing up my pattern as I worked. The project evolved as it grew on my needles and really came to life! Thus, “The Spaces in Between” came to be!
- Pick a combination of 2 brightly colored yarns and 1 neutral. The two bright colored yarns are the dominant colors in the shawl, while the neutral plays a smaller role. If bright colors aren’t your “thing” you can use more subdued tones as well. My goal in designing the shawl was to show off the fabulous, saturated colors of the gorgeous Ella Rae yarn. Just be sure that you have two colors that have good contrast and a more subdued neutral to go in between them.
- If you are like me and hate having loads of tails to weave in, carry your yarn as you work. Do this by bringing non-working strands over the working strand from front to back, before knitting the first st of each “right side” row. It is perfectly acceptable to break yarn and join the new color each time you begin a new section if you do not like to carry your yarn.
- Use a row counter to track your progress. The stitch counts for each row are given in the pattern. As long as you know which row you are working, you can easily assess whether or not you are on track. Be sure to decide whether or not you will change the row counter when you start or finish a row. My preference is to change it when a row is complete so I know what work is already done.
NEEDLES AND STITCHING:
Needles - US 3/3.25mm Gauge 24 stitches and 24 rows = 4 inches in CO 24 sts. Work flat in garter st for 24 rows.
FINISHED DIMENSIONS:
- approx. 50 inches wide - approx. 25 inches tall
Materials